My journey to a proper looking clip-on setup
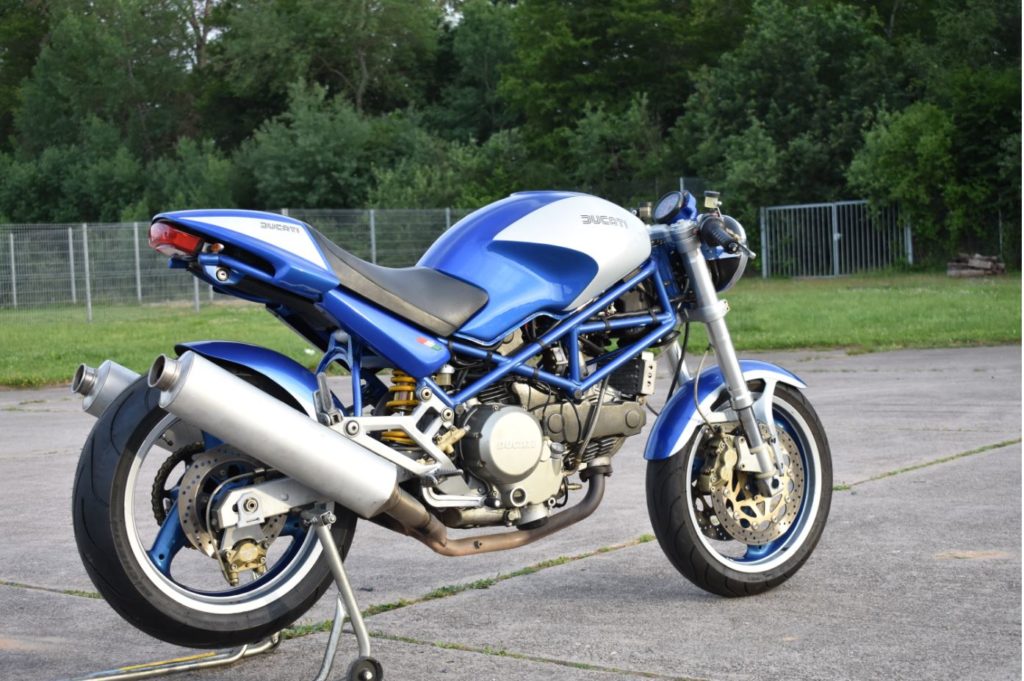
In my early years as a motorcyclist, my first full scale motorcycle was a Ducati Monster 750 out of the year 2000. I desperately safed money to get such a bike, the frame and the engine just blew my mind. Back then, I wasn’t really into full enclosed fairing and watercooled engines.
While driving the bike for several years, I started tinkering on it, especially since I was not able to afford a firm to take care of the maintenance works and because, like most of the youngsters, I wanted it to have my personal touch.
A couple of Monsters with clip on settings crossed my path, and I really liked the idea of having a nice Clip-On setup on the monster, to get a bit closer to a classy track riding stance.
Since I could (again the money) not afford a plug&play aluminum milled fork mounts, that would be able to support nice clip-ons, I started to experiment with the standard fork bridge and SuperSports bridges, and Clip-Ons of various origin.
All the solutions that I came up at that time were not really satisfying, I recently decided to give it another go!
This time, I wanted to go mostly with standard Ducati parts from other models to still keep it low budget (since my pride forbid to just buy plug&play milled parts off the internet).
The Ducati ST2 bridges looked very nice, the only issue was, that 1.) they didnt support the same steering head/steering bearings measurements as the monster,
and 2.) That I wanted to mount the Clip-Ons BELOW the bridges, and not bolt them onto the thing, like it is standard on the ST2 bikes. So I decided to slightely change the ST2 bridges to support my needs, and then manufacture adapters, to fit it onto the monster.
An issue that later turned out was, that the ST2 rake and the monster rake are not the same either. Luckily I figured, that the ST models share the same rake as the SuperSports models, while the SuperSports models have the same steering head size as the monsters. Whole thing in short: I coupled the ST2 upper bridge with a SuperSports lower bridge and manufactured a small adapter. Now the whole setup fits perfectly and looks very „factory like“.

Clear to see here, the standard ST2 handlebar mounts that had to come off 
The completed setup between ST2 and SuperSports bridges 
top view on the prepped upper bridge 
The bridge even carries out neat little racoon!
I was very pleased by now, but the next problem was right around the corner: The heigt of the ST2 bridge and its shape allows to use the standard monster ingnition/steering lock unit, but there is a collision. To continue using it, I milled a large radius into the cast-unit-casing and shortened the lock-bolt. After that treatment it fitted right in.

The last, and maybe even the most severe hurdle that had to be taken was finding a nice solution for the speedometer unit. The first thoughts were „fix the original one to the new setup“ which would have looked like hard tinkering again.
The second though was „just buy a centered-speedometer off the internet and have to problem fixed plug&play“. Problem with the second thought, again, was that it would have stressed the budget immensely. Secondly, the thing would always look like a foreign object in the setup and mess with the „could have come from the factory like that“-look that I was trying to establish.
So I decided to design a new casing for the original speedometer and control panel wiring and make my own centered cool looking control panel unit.

So I designed the thing and had it laster-sintered by a company in Belgium, which still came out way cheaper then buying a whole plug&play thing. On the plus side as well is, that I was able to maintain my original milage on the panel, and that there was no major rewiring necessary, since I did not switch from an mechanical to an electronical speed-measuring solution.
I have to admit, that the design that I currently use would not be ideal for sale, since the installation of the whole thing was a bit of a hussle, but it still is the first design and I am certain, that a version 2.0 would do the trick and be a nice application for other monsters.
I plan to offer two versions of the Speedometer casing: One that supports a clip-on setup and one that can be installed plug&play on the standard Monster upper forkbridge.

The control lamps are now LED-lights that are hubbed onto the original control panel wires. I painted the whole thing in the bikes color-theme (Sadly, I am not a great painter, which means that the paintjob of the speedometer casing lacks a bit of professionalism) and mounted the original speedometer.
The mounted clip-ons come off a Ducati Sport Classic 1000 model and are probably the most expensive parts of the setup. Lucky me, I got my hands on a pair for small money. The setup actually supports various clip-on handlebars, so it could be optimized to support the riders preferences.

All in all it goes quite nice, and it is way more comfortable and visually pleasing then most of the setups for the monster that I have seen so far. I plan on offering the setup for customers, so in case you are interested, shoot us a message!